Off and on over the past five years I’ve had the opportunity to make pottery. It is one of those great activities, that allows me to be creative, not think about life and make things with my hands. I would never consider myself to be a creative person or artistic by any means. I can’t draw, paint, wood carve or really do anything that most would consider artistic but for some reason I can somehow manage to take a lump of wet dirt put it on a potter’s wheel and if I’m lucky make something functional. I think for me it’s a great way to have an outlet for work and life in general. For all of us office stiffs who spend our days, nights and the time in-between sometimes married to our jobs, pottery has allowed me that release and that creative outlet I have always longed for. Granted when I get my opportunities to throw, I don’t always make something worth keeping but on some occasions when the stars are aligned things work out.
The process is actually quite simple, it’s just the execution that can be challenging, there are a lot of moving parts to make pottery. Like wedging the clay centering on a spinning wheel, making a well to shape the clay, the actual act of pulling up the sides and shaping the clay into something you wanted to make. Plus in my case working in a public studio you don’t have any control on when things get fired, how the pots gets loaded in the kiln, the heat levels in the kiln and the ultimate outcome. You can make the best thing ever and take great care to make sure it is ready for the bisque and glaze firing, take extra care to make sure the glaze is applied just right. But then during the load process the pot gets bumped or the heat in the kiln is not regulated just right or the glaze just doesn’t do what it should and you end up with nothing or something not worth keeping. That being said, in most cases items come out and are perfectly fine, but as you become more critical you expect things to look the way you want and if you glaze in green you want solid green, and if you get mostly green and some white it can be a downer. But beauty is in the eye of the beholder, and if you’re not keen on something usually someone else is, they don’t know what you were shooting for if you wanted red and got white, if the pot is functional someone will find a use for it usually. Don’t get me wrong though I love love love the process and enjoy the atmosphere and the collective goal of the students and teachers to make pottery of all kinds. It’s great to see how people can take the same materials and make so many amazing things with it. I am constantly enlightened to a new process or idea of what two hands, clay, water and shaping tools can do. In my case though this term I’ve just been focused on cups as you can see.
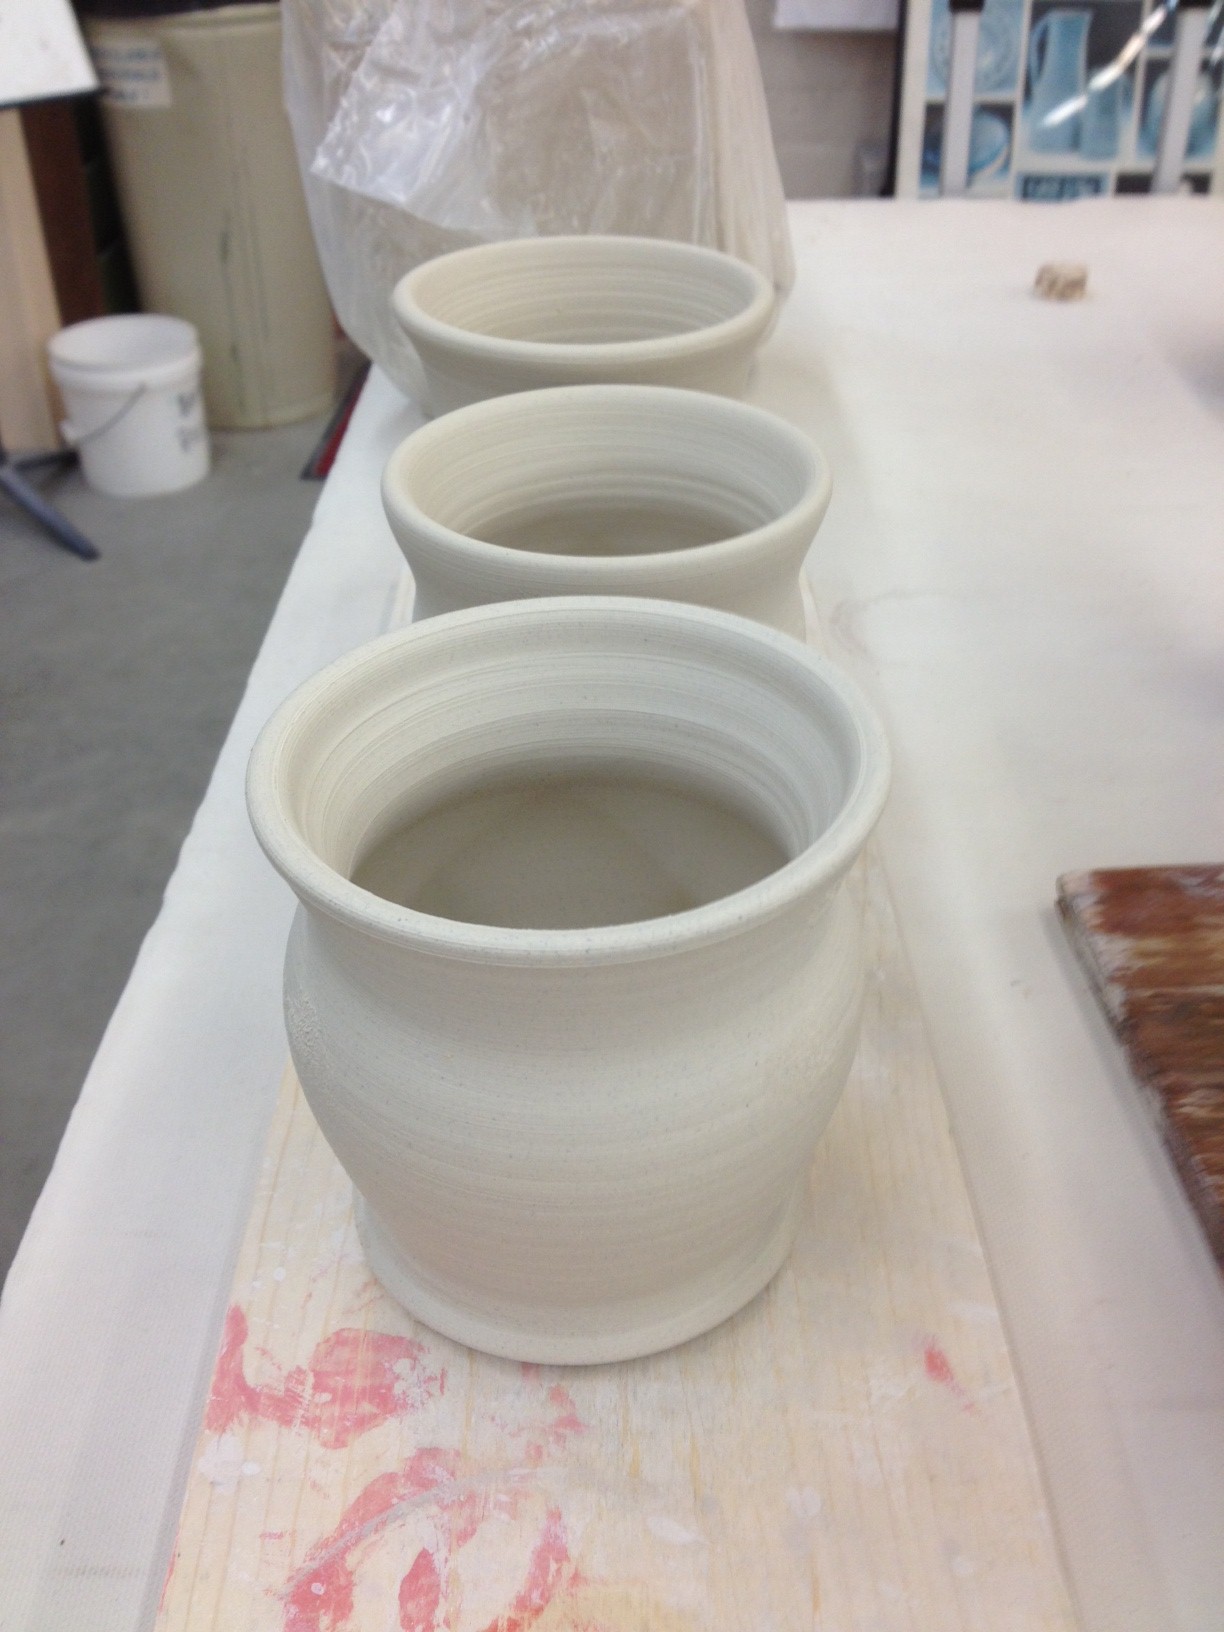
So here’s the process I went through to get to the almost finished product. First you wedge the clay into a ball, so of like kneading dough. The purpose is to soften the clay get our any air bubbles and create a shape that is easy to put on the wheel and center. Once centered the hard work begins, with a little arm force, water and wheel speed you center shape and make your piece.
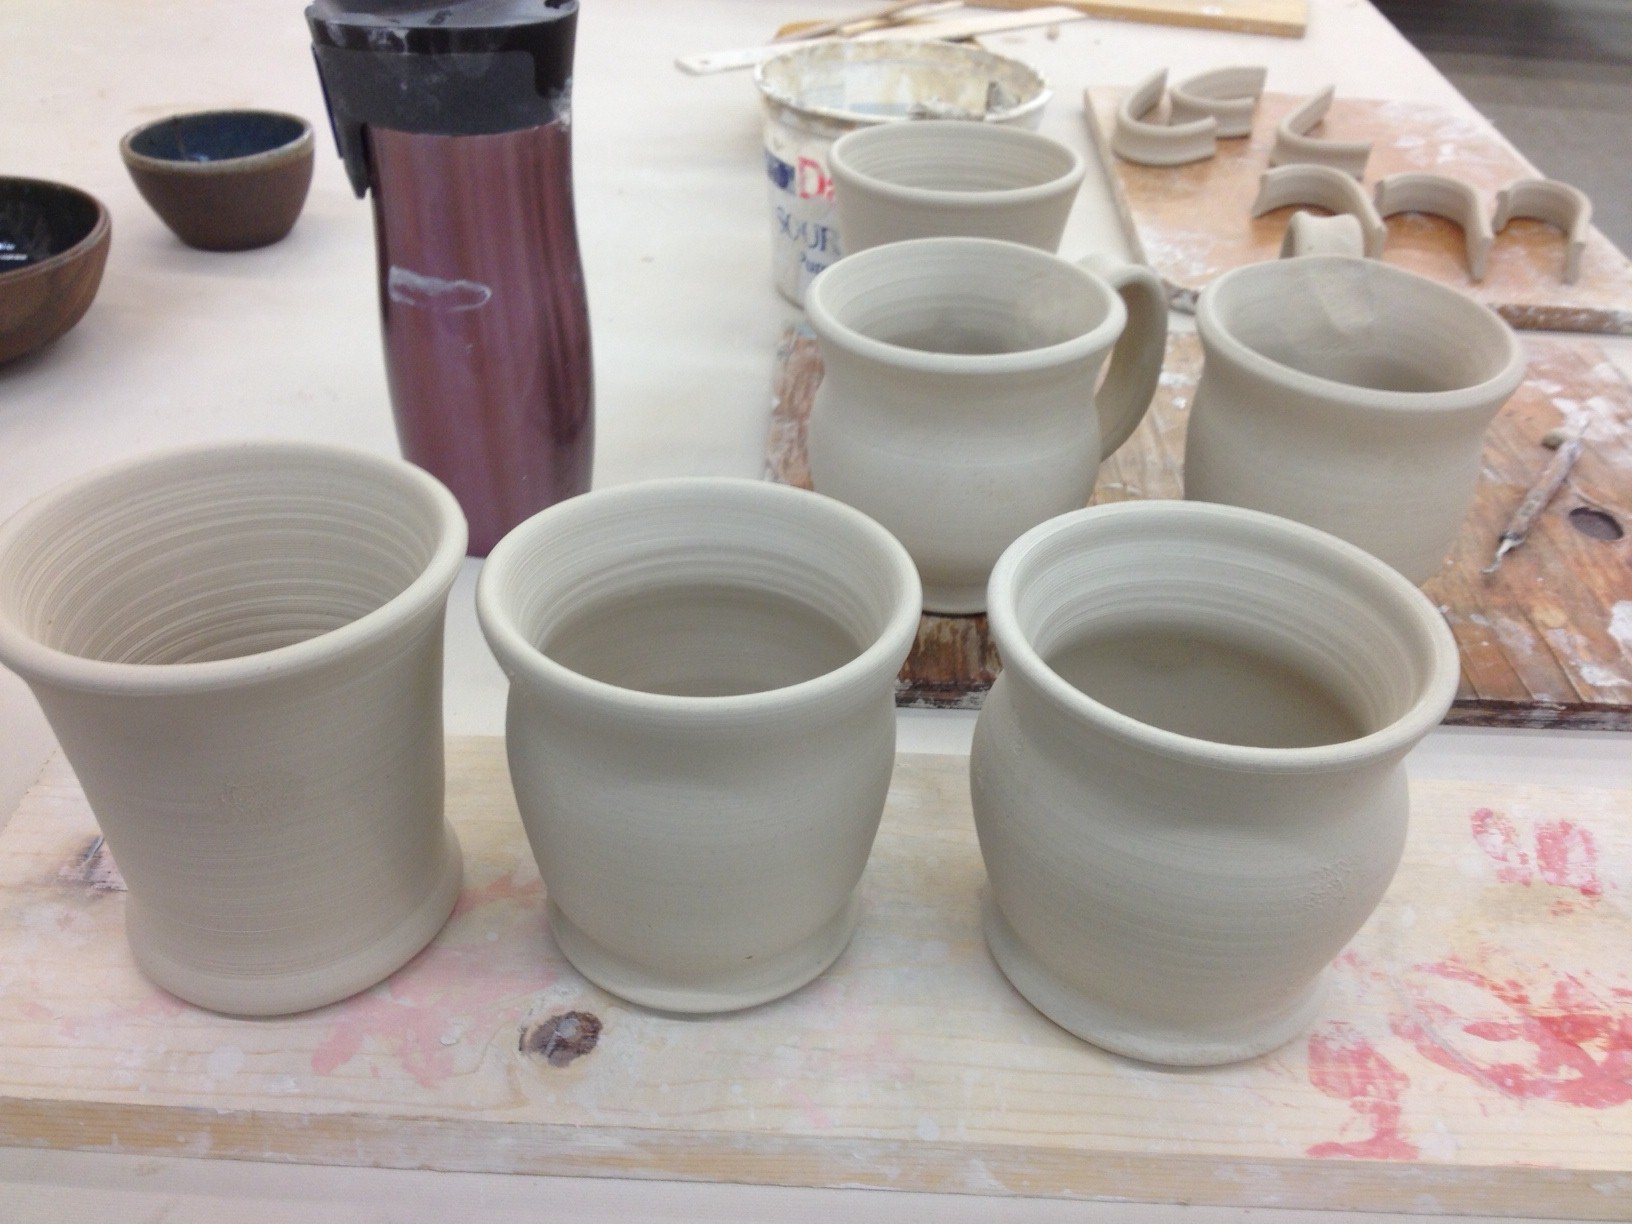
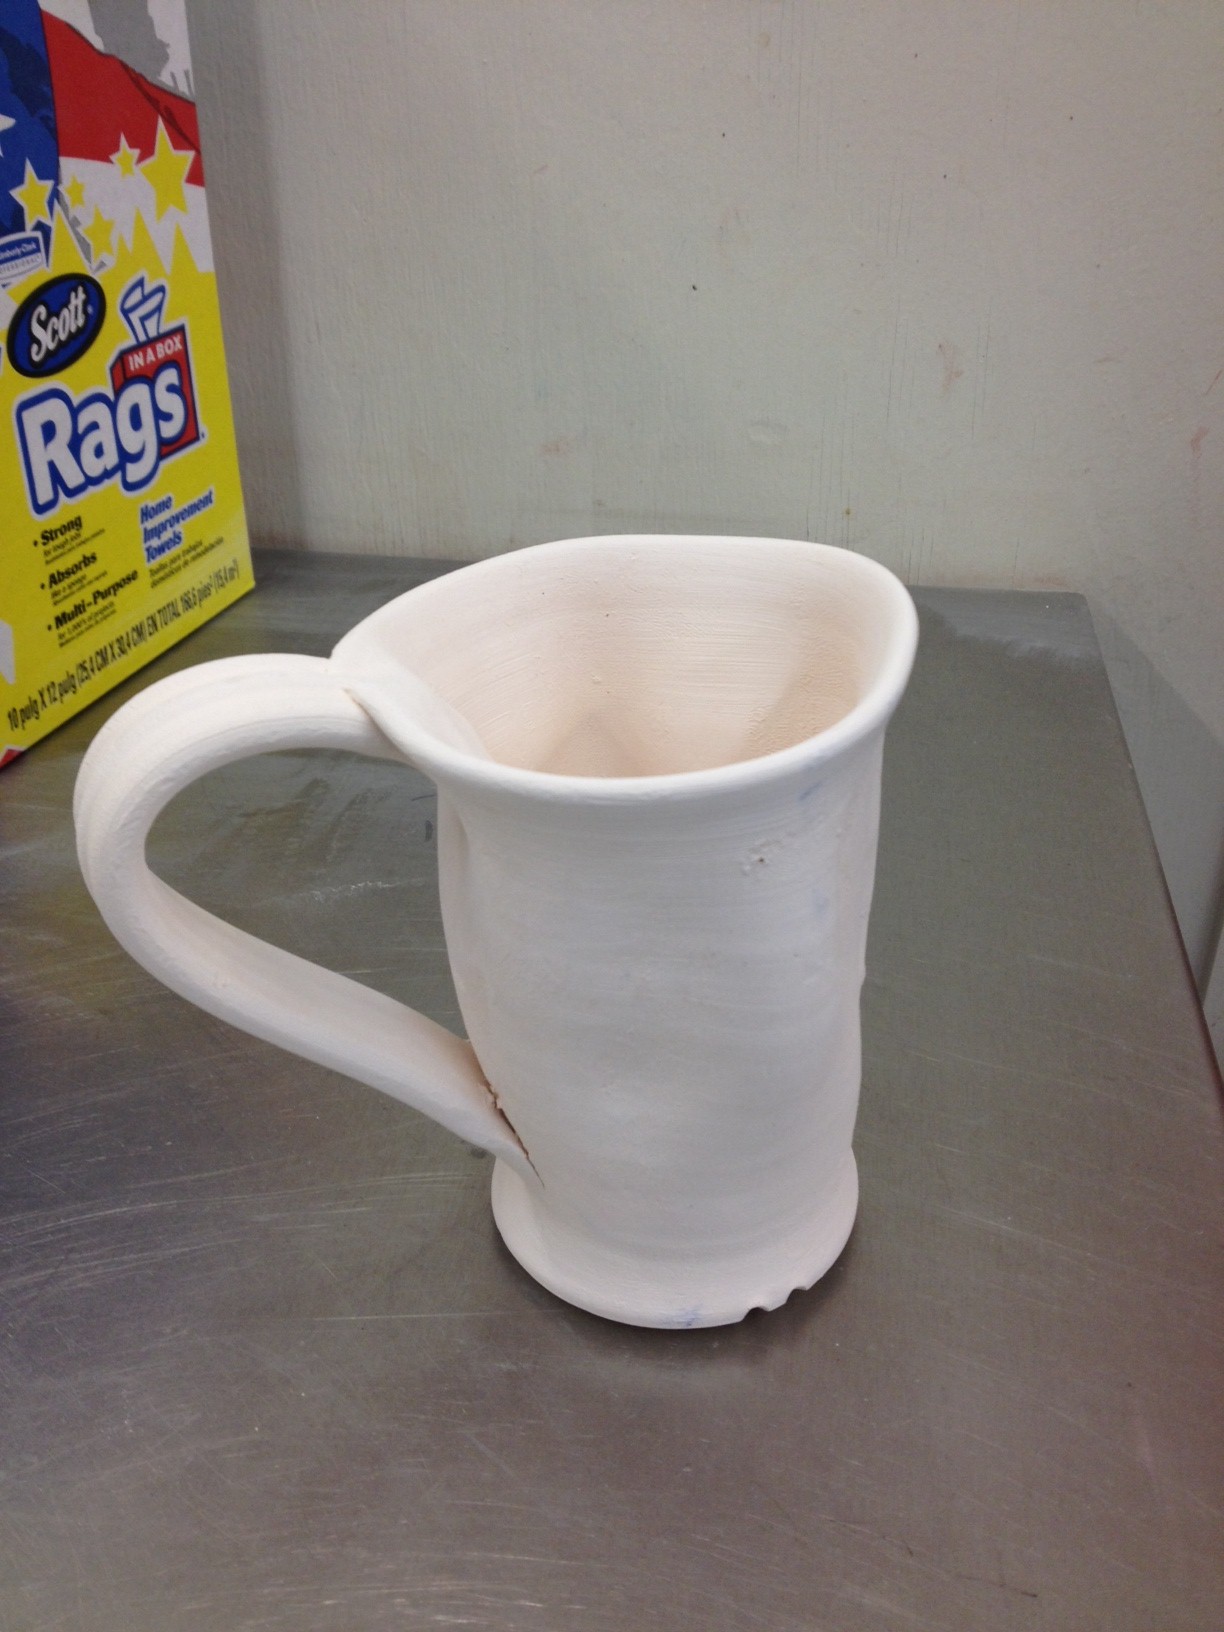
Once that was done I made handles with an extruder, think giant pasta shaper. You can also pull handles but with my lack of skill in that department and my lack of time I went for the easier approach. Trust me if I could make them myself I would they look better and are even more personal. Then I attached them to the cups. Normally I would have waited a few hours to attach them after the cups were drier to the touch and the handles had set a bit, but again time was my enemy.
Now I have to wait for them to dry, in good conditions this can take one or two days. It just depends on the environment and where you store them. The fact of the matter is, that you want them to dry slowly and not too fast. If they dry to fast they may crack prior to bisque firing or during the firing. It’s a tricky game to determine when is dry enough to fire sometimes. In my case I can only go to class once a week, so they get a full seven days to dry before firing.


Once fired if all goes according to plan you get cups that are ready to glaze, this is called bisque ware. Now there are many ways to fire pottery, but at my studio it is a gas kiln that takes 2 ½ days between loading firing and cool down. If any of these steps get messed up you may end up with shards of clay or something not so pleasant. In my case product that’s good to go.


Now it’s glaze time!!! My studio has 30 or so glazes that can be dipped or sprayed onto your pieces. Once this is done kiln time again. This time for 1 ½ days or so in the kiln. Once done you have a finished piece. The pieces are quickly dipped in the glaze, then air dried. I am shooting for a middle to dark green top and a waxy to clear white on the lower section with green on the inside. Let’s see what happens.


Stay tuned for the finished product, I’m hoping to get them back very soon. It’s like Christmas each week when I go to class and look for my stuff hoping it’s done. Let’s hope when I go in next their done so I and share.
STAY TUNED!!!!!
